The OpenStack Command Line Interface (CLI) is a powerful tool for managing OpenStack resources. This guide will show you how to install the OpenStack CLI, log in to the OpenStack CLI, and use the OpenStack CLI to manage OpenStack resources.
This guide makes use of the clouds.yaml file to store OpenStack credentials.
You can also use environment variables to store your credentials using the
openrc file. The clouds.yaml file is the recommended way to store your
OpenStack credentials, as it is easier to manage and add multiple clouds
(projects, regions etc.).
Installation of the OpenStack CLI
The installation of the OpenStack CLI is different for each Operating System and distrubution. Below you will find the installation instructions for Windows.
For Linux installations please see Using the OpenStack CLI (Linux)
Installing Microsoft Visual C++
The OpenStack CLI is build with Python3 but it requires the Microsoft Visual C++ to be installed on your system. You can download the Microsoft Visual C++ using the Microsoft C++ Build Tools
Step 1
Navigate to the
Microsoft C++ Build Tools page
and download the Build Tools.
Step 2
Run the installer which will download and install the required components.
Step 3
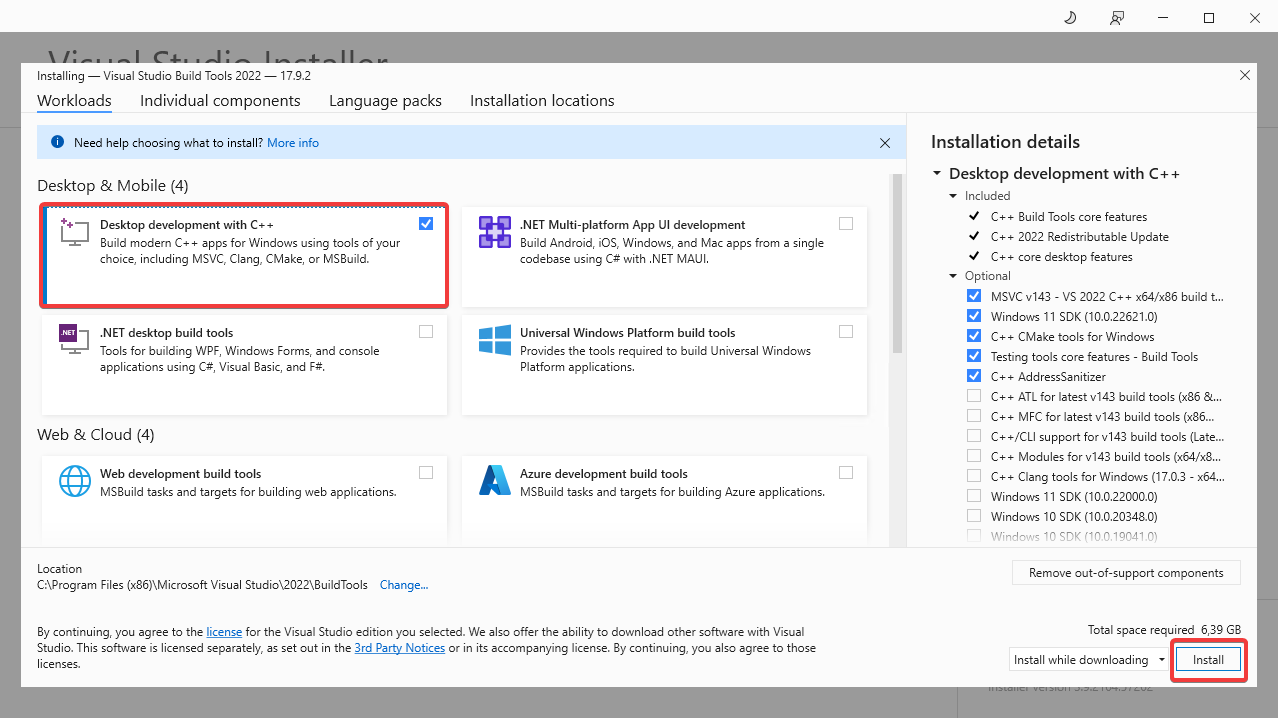
Once the installation is complete, the Visual Studio Build Tools will
automatically open. From this window select the Desktop development with C++.
This will install the required components for the OpenStack CLI to work. Click
the Install button to start the installation.
After the installation has finished proceed to Installing Python3.
Installing Python3
Since the OpenStack Client is build with Python3 we will have to install python3 on our system first.
Step 1
Navigate to the Python Downloads page and
download the latest version of Python3. (Do not download the pre-release
version)
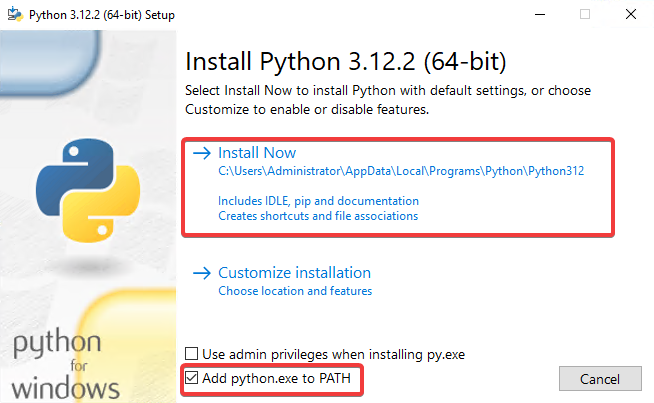
Step 2
Run the installer and make sure to check the box that says Add Python 3.x to
PATH and click Install Now.
After the installation has finished proceed to Installing the OpenStack CLI.
Installing the OpenStack CLI
Now that we have prepared the environment by installing the required components we can now install the OpenStack CLI.
Step 1
Open PowerShell you can do this by hitting WIN + R in the input box that
appears you type PowerShell and hit Enter.
Step 2
Within the PowerShell window run the following command to make sure we have
the latest version of pip installed.
python -m pip install --upgrade pip
Step 3
Now that we are sure that we have the latest version of pip we can install the
OpenStack CLI.
pip install python-openstackclient
After the installation has finished proceed to Preparing your OpenStack Credentials.
Preparing Your OpenStack Credentials
After installing the OpenStack CLI, we need to prepare our credentials to make sure we are able to login using the OpenStack CLI.
Step 1
First we will create a file to store our OpenStack credentials. In this
tutorial we will use the clouds.yaml file to store our credentials. You
can also use environment variables to store your credentials using the
openrc file altough the openrc file does not by default on Windows.
Since we already have our PowerShell open we proceed with creating the OpenStack configuration directory using PowerShell. You can also create the directory yourself if you prefer.
New-Item -ItemType Directory -Force -Path "$env:USERPROFILE\.config\openstack"
Note: If you want to create the directory by hand using windows explorer the directory structure should look like:
C:\Users\<username>\.config\openstack
Step 2
We will now create the clouds.yaml file, the next step will describe how to
populate the file with the necessary information.
New-Item -Path "$env:USERPROFILE\.config\openstack\clouds.yaml" -ItemType File
Note: When creating the clouds.yaml manually using for example Windows Explorer make sure you create a
clouds.yamlfile and not accidentaly create aclouds.yaml.txtfile which is not recognized by the OpenStack CLI.
Step 3
Now that we have created the clouds.yaml file we will open the clouds.yaml file
using notepad. The following command will start Notepad with the clouds.yaml
you can also chose to open the file manually using Windows Explorer.
Start-Process notepad.exe -ArgumentList "$env:USERPROFILE\.config\openstack\clouds.yaml"
Note: If you want to open the clouds.yaml file manually using Windows Explorer you can find the clouds.yaml file in:
C:\Users\<username>\.config\openstack
Step 4
In the clouds.yaml file add the following content to it. Replace: region,
<cloud_name>, <auth_url>, <username>, <password>, <project_name>, <project_id>,
<user_domain_name>, and <project_domain_name> with your OpenStack
credentials.
clouds:
  <cloud_name>:
    auth:
      auth_url: <auth_url>
      username: "<username>"
      project_id: <project_id>
      project_name: "<project_name>"
      user_domain_name: "<user_domain_name>"
      password: "<password>"
    region_name: "<region>"
    interface: "public"
    identity_api_version: 3
Note: The cloud_name can be any name you want to give to your cloud. We recommend using the region name as the cloud name.
Note: If you do not know all information, you can download the clouds.yaml file from the OpenStack dashboard. Go to the OpenStack dashboard, click on
Projectand thenAPI Access. Click onDOWNLOAD OPENSTACK RC FILEand click onOPENSTACK CLOUDS.YAML FILE. This will download the clouds.yaml file with all the necessary information.
Note: For security reasons you may want to remove the
passwordline from the clouds.yaml file, when you enter a command in the OpenStack CLI your password will be asked for.
Step 5
After entering the correct information in the clouds.yaml file we can now save
the clouds.yaml file by pressing CTRL + S and then close the file by clicking
on the X in the top right corner of the Notepad window or
pressing ALT + F4 in the notepad Window.
After you have configured your credentials you can procceed to Using the OpenStack CLI to test if the OpenStack CLI works.
Using the OpenStack CLI
Now that we have installed the OpenStack CLI, we can use the OpenStack CLI to manage our OpenStack resources.
First we we need to specify the cloud (project/region) we want to use. make
sure to replace <cloud_name> with the name you used in the clouds.yaml
file.
$env:OS_CLOUD=<cloud_name>
Now we can use the OpenStack CLI to manage our OpenStack resources. For example, to list all the available images, run the following command:
openstack image list
To list all openstack instances (servers), run the following command:
openstack flavor list
Your are now ready to use the OpenStack CLI to manage your OpenStack resources. The OpenStack CLI has many more commands and options, so be sure to check the OpenStack CLI documentation
]]>Note: Instead of setting the
OS_CLOUDenvironment variable you can also specify the cloud using the--os-cloudoption in the OpenStack CLI commands.